Thursday, September 27, 2012

Guest Post: Agnes Jimenez


DIY Halloween Decorations and Foods That You Will Enjoy

Hi!  Today I have a guest blogger, Agnes Jimenez.  She is a professional blogger and writer. She writes for many online establishments and supports those ones that offer alternative lifestyles to consumers.  As a frugal living advocate, she recommends DailyBread.com for budget conscious moms who want to get big savings in shopping for food and food storage.

When it comes to Halloween, decorations and good food are key. You can create a wonderful Halloween experience with DIY decorations and food, especially if you are on a budget. It is all too easy to spend a great deal of money for this holiday, so it is a huge plus if you are skilled and/or crafty with cooking, baking, and art/design projects. The following are only a few of the many great ideas that are out there for Halloween.

Pumpkin Pillars

These will look great outside on either side of your front steps. Find pumpkins that are the right size to fit in urns of your choosing, and stack one or more on top, cutting out all the stalks except for the top pumpkins. Make sure that you scoop out all of the insides of the pumpkins. Use black markers to make designs of spooky things that you like, and go over it with black enamel paint when you have it finalized. One beautiful idea is to draw a tree going up the pumpkins, so that the lines match up for the image. Then, take a drill and cut out star shapes. Place candles inside of them for a nice effect.


Creepy Door Wreath

Take a simple craft store wreath, and spray paint it black. Have your kids go out and find twigs and such things to place on it with a glue gun (or thread or twine if possible). Then, you can further embellish it with a plain orange or Halloween themed ribbon, or just stretch some fake cobwebs across it for extra flair.

(example from mcillecespot.blogspot.com with rubber snakes)

Candy Apples

Apples are a healthy food that some kids say no to. However, when you put something like caramel, chocolate, or a sugary coating on it with some candies (M&M's and Reese's Pieces are good choices), they will swarm over these wonderful Fall snacks. They are fairly easy to make at home- all you have to do is remove the core and stem, place a stick inside, and dip it in your choice of covering that you can make in just a few minutes.
(Mini caramel apples made using melon ballers.  Source: Domesticali)
 Caramel Apple bites

Other great ideas for Halloween treats include: "bloody" punch with grapes for eyeballs and other spooky things; cupcakes with candy spiders, bats, black cats, etc.; skewered eyeballs (green and black olives, chicken, cremini mushrooms, round carrot slices, olive oil, balsamic vinegar, etc.); ghost-shaped cornbread; and many other foods. Be sure to have a good mix of "healthy" and junk foods, especially if you are having a big party. That way, everyone is sure to find something that they like.


Monday, September 17, 2012

Living and Dining

When we moved into this house in July there were some things left by the previous inhabitants that were just not me.  For example, these curtains (or whatever they're called) in the kitchen.  Plaid, country-esk.  So. Not. Me.  They were also used above the doors to the back yard but I guess I didn't get a picture of that.  


I decided to redo the kitchen/dining area stat so I picked up some letters (E, A, T) at Hobby Lobby and spray painted them silver.

The thing that has taken so long is just getting to painting the curtains (ie, $4.47 sheets from Walmart).  The hangy and chalkboard to the right are from Ikea.  We needed a place for Morgan's preschool artwork and this is it.  I love the metal wire thing to hang art.  Each was like $12 and so worth it.

I added the same curtains in the living room.  Here is the before, pardon the mess.

After


But, yay, the living/dining area is finished!  

Monday, September 10, 2012

No Sew Pillow

I have a ton of (like 6) pillows that are faded and will never be used again in their current state so I decided it would be prudent to recover and utilize them.  Then I can inundate our bed with cutesy decoration pillows that my husband is just going to love.  

This tutorial is not the most thorough, but it's not a science.  If you do pillows like this, make up your own thing.  

Start with a piece of material that is about 2 inches wider than the width of the pillow and about 3 times the length.  

Hot glue the sides onto the pillow.


Fold one of the lengths over and hot glue the sides down with the ends folded under (I glued the edges under before I glued it down).

Glue the front down in whatever way you want.  I did it in a wedge and glued a bow to the edge.

Wednesday, September 5, 2012

Striped Dresser

Major project alert!

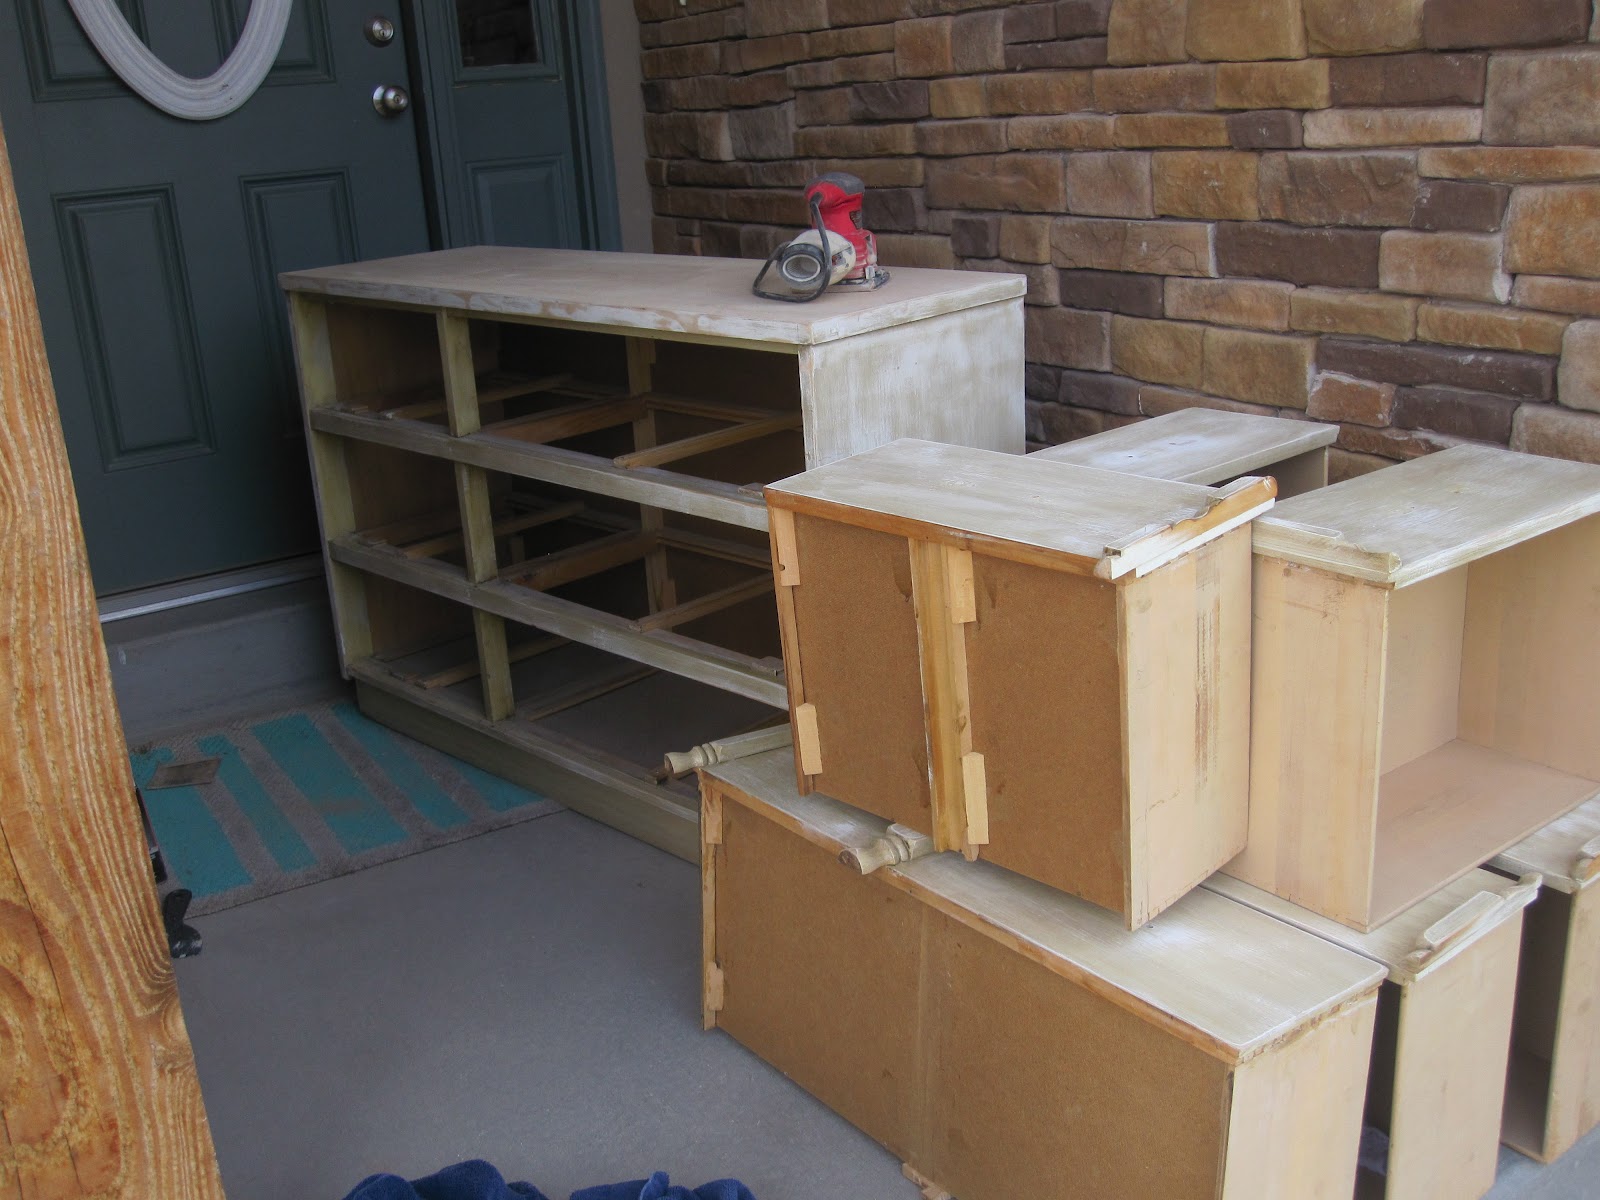
I have been working on this dresser all week, minus Labor Day weekend where I went to the town where I grew up and experienced some major hick-age.

My husband and I have been married for 5 1/2 years.  He had this dresser when we got married and I never thought to ask if it was special to him, I just assumed that it was.  Three years later we started talking about it and I found out that it was his x-girlfriend's sister's and that he doesn't even know how he got it.  Score for me!  Now it's mine.  But it took another 2 1/2 years for me to decide to change it.  And now I have.

Before
After

I did this all on my front porch so it was always well ventilated.  First I sanded it.  I just roughed up the edges and the drawers.

But I sanded the top all the way to the wood.

This one is hard to see but I drew a flower on the top with a pencil.  (Got the idea here).

And painted the dresser white.

I picked up some ebony stain and started staining the insides of the petals that I drew.  I started with the insides so that they would be darker than the outsides.

Then I outlined the petals with the stain.

Next I stained the rest of the petals.  I really love how this looks... but I kept going.

I rubbed the stain around the edges to fill in the brown parts with black so it wouldn't be so prominent.

Put varnish on the top. 

 Then decided it was a little too dark around the outsides of the petals so I sanded around the petals and varnished again.

I have been loving stripes lately and wanted to incorporate them into this project so I taped it off and painted gray stripes that I later sanded slightly to distress.  Side note: I love green frog tape way more than the blue painters tape.  It is so much better!

I spray painted the handles black (they were bronze before).


I have had a big dilemma in this house because there isn't a lot of closet space so I don't have room for our shoes, which have been placed in the entry hallway on the floor and in totes (on the floor in the entry).  

Solution!


I also wanted a place to put our keys right when we walk in so we stop losing them.


Linking up at the great Linky parties found at the bottom of the blog.  They are where I find most of my inspiration!  Check them out!

plus


Thursday, August 23, 2012

"Tucked In" Toddler Shirt

My little 3 year old gets to go to preschool this year.  She started today, in fact.  One of the most exciting things for me was to go shopping for her school clothes (by myself).  I picked up a couple of t-shirts that would look so cute tucked into the skirts that go with them but it's hard to keep a shirt tucked in with a toddler.  I thought about just tying a knot or using a safety pin in the back but that didn't look right.  I decided to add some elastic to the bottom of the back of the shirt so it just looked like it was tucked and I never have to worry about fixing it.


I sewed the end of the elastic at the bottom hem, starting at the side hem.  Make sense?

Then I pulled it tight and sewed all the way to the other side.


Here's the other one that I did.

Tuesday, August 21, 2012

Healthy Cookies-ish

Let me tell you about something that is hard for me.  Eating well and not seeing results!  Obviously I won't see results of eating well until after November when I'm no longer pregnant.  But this time I have a goal to eat and exercise well during pregnancy.  When I was pregnant with Morgan I sort of let myself have whatever I wanted.  Bag of Halloween candy in one sitting?  Why not?!  I exercised the whole time, if walking for 30 minutes a day counts (which it does for many people, but not for me).  I gained 43 pounds!  FORTY THREE POUNDS!  I thought that was fine because I was on the lower end of my "healthy range" when I started, but 8 months after Morgan was born, when I was still trying to lose the weight, I realized that those bags of candy were so not worth it.  I just couldn't lose the last 10 pounds.  So this time I am trying hard not to gain the last 10 pounds so I don't have to lose it (and because we have a cruise scheduled in March and I want to look freaking awesome).

Does that mean I eat totally clean and never have treats?  Um, no.  I eat more treats than I should.  However, I do eat a whole lot better than I did with Morgan.  I am trying to skip the sweets during the week and only have them on weekends.  It's not totally working, but there are days where I don't have any sweets.

So, the point of this post is to introduce you to this "cookie" that I found on Pinterest.  It is more of a "healthy bar" than a "cookie," but it hits the spot when I want a treat.  Add a little peanut butter (I didn't have walnuts to make them) and you have a great, balanced energy bar. (PS If you want to follow me on Pinterest, go here or click on the button on the right).


Ingredients:
2bananas
1 1/2cup oatmeal
1cup unsweetened applesauce
1/4cup chopped walnuts
3tbsp raisins
2tbsp dried cranberries
1tsp vanilla extract
1tsp cinnamon

Directions:

  1. preheat heat oven to 350 degrees
  2. mix vanilla extract & cinnamon into the applesauce
  3. blend applesauce mixture with all other ingredients & let sit for 10 minutes
  4. drop cookie dough, by spoonfuls, onto a parchment paper lined cookie sheet & flatten cookies into rounds ~ (makes 12 - 16 cookies, depending on size)
  5. bake approx. 30 minutes, or until golden & done
  6. remove from oven & let rest on cookie sheet for 5 minutes, then move to cooling rack
  7. when completely cool store in a covered container
  8. ~ MAKES 12 LARGE OR 16 REGULAR COOKIES

Nutritional Analysis:


Nutrition Facts
Serving Size 56.6g
Amount Per Serving
Calories
90
Calories from Fat
21
% Daily Value*
Total Fat
2.3g
4%
Saturated Fat
0.2g
1%
Trans Fat
0.0g
Cholesterol
0mg
0%
Sodium
2mg
0%
Total Carbohydrates
16.1g
5%
Dietary Fiber
2.2g
9%
Sugars
6.0g
Protein
2.3g
Vitamin A 0%Vitamin C 4%
Calcium 1%Iron 3%
* Based on a 2000 calorie diet

Nutritional details are an estimate and should only be used as a guide for approximation.
Legend

 Fat
 Protein
 Carbs
 Alcohol
 Other

Calorie Breakdown (?)
Nutrition Breakdown
Daily Values (?)
Daily Values


For more clean-eating meals, check out Watching What I Eat.  It's got a lot of great, healthy stuff!
Related Posts Plugin for WordPress, Blogger...