
Thanks for visiting The Turquoise Piano! I hope everyone had a great weekend. Today I'm going to share this project that I've been working on for like ever.
Picture it. Christmas, 1991 (I think -- 1990 was when I got my first CD player so it couldn't have been that year). I was eleven years old and I got this beautiful vanity. I loved it. My cousin had one and she was so cool so I was excited to enter her realm.


Now fast forward 2.1 decades and both Nielson sisters (me and my sister, who will be 11 in November) and you have the same vanity, slightly abused, and very in need of an update. I took it home from my mom's when we did her big basement makeover.
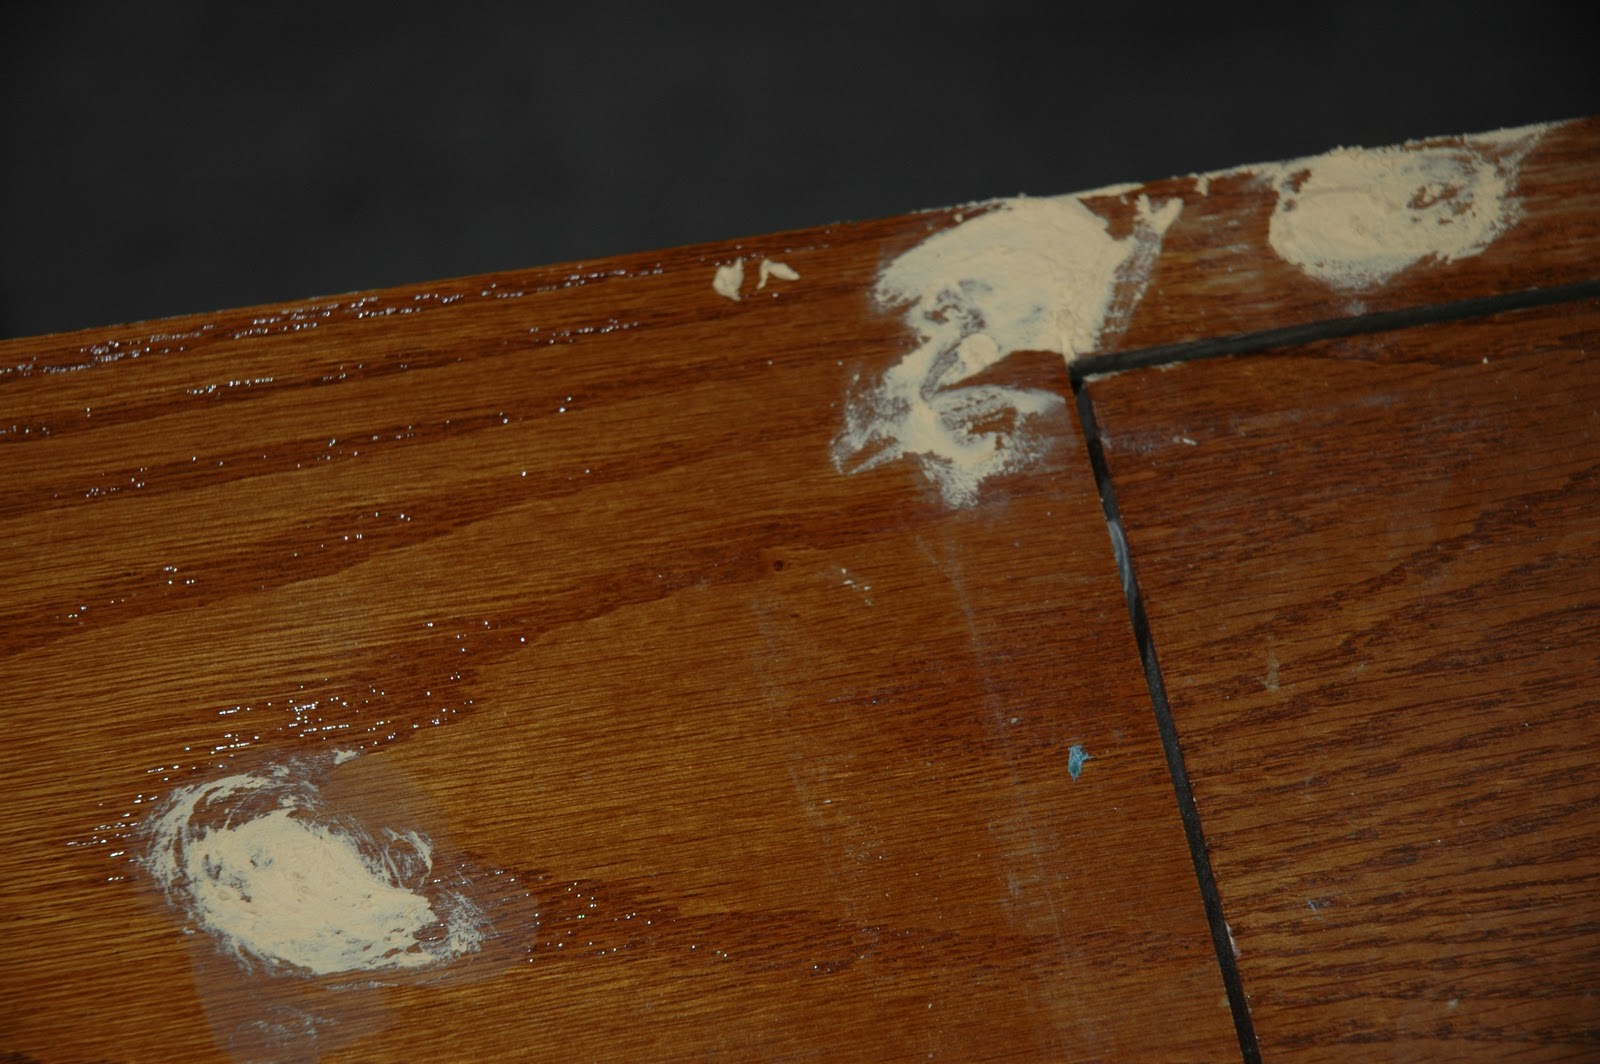
I started by removing the top drawers and wood thing and filling the holes and cracks with wood filler.
Then I spray painted the handles black. I did it while they were still attached so I could get the screws too.

Then a couple of months go by and we move and try to organize. Finally I pulled it out of the garage and sanded it with a fine grit sandpaper (the one just courser than the finest).

I washed and wiped off all the dust and then spray painted the edges black. You'll see why soon.

Then I painted all the drawers white.

Next, I spray painted the entire thing gray and put the handles back on.

And then I started distressing the edges by sanding them. This is where the black paint underneath comes in. You can see that the black shows through when I sanded the gray off.

Since stenciling has been all the rage, I decided to try it out for myself so I taped the stencil down and sprayed it white.

And felt like an impatient idiot for not taping it all down and getting white everywhere.

So I sanded and painted the top gray again.
And painted the inside white while I was waiting for the other paint to dry.

But apparently I didn't wait long enough because this is what happened when I sanded again to get the paint to look the same. Gah!

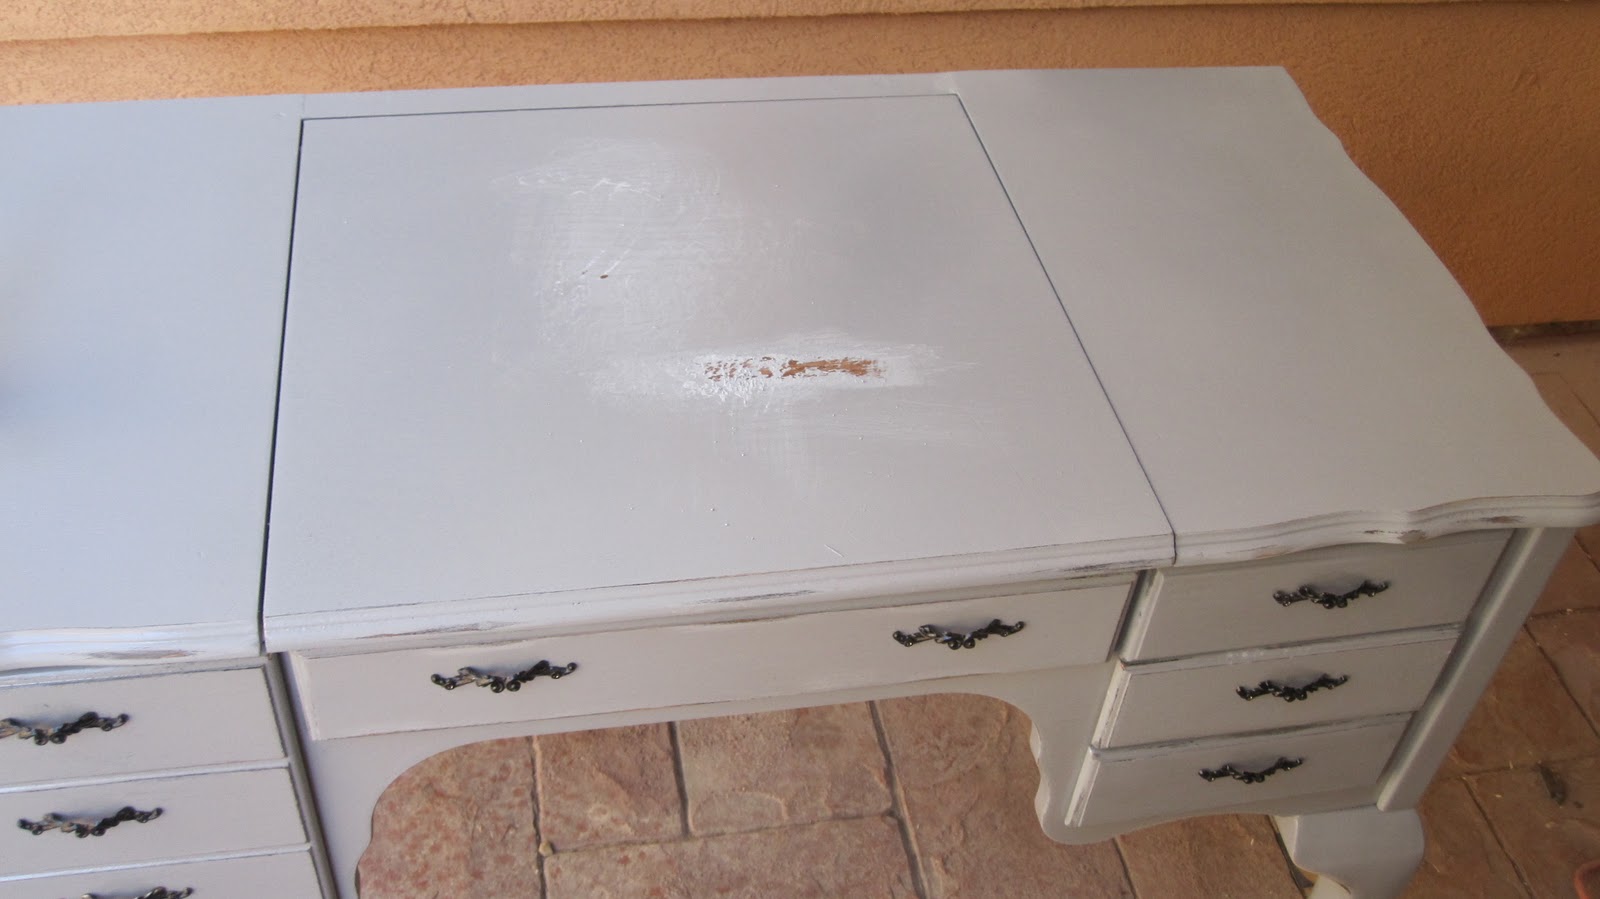
So I sanded and painted the flippin' thing once again.
This time I used a brush to do the stencil. I still didn't read the instructions though. I guess it works best if you spray some "adhesive" spray to the stencil before putting it on the project. Well, since I didn't do that this time it leaked. I was going to have a nice, crisp flower but it ended up not being very crisp. But listen, I wasn't going to start over. I mean, how much paint could I go through on this project (good thing I got it on clearance at Lowe's)? I didn't even want to know. So I let it dry (really this time -- like over night) and sanded, but only enough to distress it and make the flower look like it's supposed to look distressed because, uh, that was the plan. Yeah. Then I distressed other parts of the top too but that's okay because the edges were distressed so it matches.
And voila, you've got an aesthetically pleasing configuration of project the humans go nuts over. Name that movie (okay, it's not the real version).

I wanted to take some great pictures of it in a field in the evening but it was already upstairs by the time I took pictures and it is in it's final resting place with some other projects that I will reveal throughout the week. On Friday you get to see the entire "craft nook" reveal. I love it! I hope you will too.


One more time:
Before
After

Hey, I started a facebook page. You can get there through the link on the right side of my blog. I'd love a "like" and I'd love it if you'd "follow" my blog at the top right. Let me know and I'll be happy to return the favor!
Linking up at the great Linky parties found at the bottom of the blog. They are where I find most of my inspiration! Check them out!
plus
Shucks, Kelli, you found another way to put your blue (even if not tuqur.) to outstanding use!
ReplyDeleteWOW, I would have LOVED a vanity/writing desk like this. It gave you a couple of surprises, some good, some not so good, but again, you did your thing and she's lovely!
Thanks for sharing again,
Suzanne in NW IL
Oh my gosh - this looks so great - and I'm so excited because I have a desk with a similar story! lol.
ReplyDeleteWe have my old desk from my little girl room -- which was painfully spray painted black and is now absolutely revolting looking. I have been wondering for sometime if I'll be able to sand/strip that pain and make it into a pretty piece again... your post has given me hope! :)
Hope you have a great week! :)
Wonderful makeover and I love love that stencil. Very cool!! Thanks for sharing the accidents too!!
ReplyDeleteHugs Giggles
Great post Kelli...love how you told the story of this makeover...thanks so much for sharing it at NIFTY THRIFTY TUESDAY. It's okay to have the linky parties at the bottom of your blog...but I do not think many people will take the time to go there to find them...so they would be better on the post.
ReplyDeleteBlessings,
Linda
Beautiful makeover and love the stencil!
ReplyDeleteThis is awesome! Where'd you get the stencil?
ReplyDeleteWow, I really love your makeover!
ReplyDeletethis is fantastic Love it!
ReplyDeleteJenn
http://housewivesofriverton.blogspot.com/
Love the transformation. It looks awesome and the stencil is so unique and cool. Thanks for sharing at my Fall into Fall party.
ReplyDeleteI think it turned out really nice. Good work! We all have our horrific painting stories ;-) - RM
ReplyDeleteOooohhh, it's so VERY beautiful!!! And who cares that you didn't "read the stenciling instructions..." NO ONE will know because it's GORGEOUS!!
ReplyDeleteLoved reading about your painting technique ;)
ReplyDeleteSo many projects start out one way and end up another, sometimes all for the better!
I am following you now (thought I already was...) Have you checked out my new blog "the BIG blogroll"? You are automatically listed there now that I am following you. The "search" feature is pretty cool!
Thanks for sharing this at my party!
xoxo Bunny Jean
Wednesday's Bunny Hop Party!
it looks beautiful and so elegant now! it was pretty outdated but your paint job saved it!
ReplyDeleteWhat a beautiful makeover! You did a lot of work but it really came out great! I will learn from you when I do my stencil this weekend :)
ReplyDeleteI love those vanities with the flip-up mirror and built-in makeup tray. Your makeover turned out lovely. :D I am visiting from Mod Mix Monday.
ReplyDeleteYou have been BUSY! I'm glad I'm not the only one who is impatient and sands before it is time or gets spray paint on things that don't need to be painted. All of your hard work paid off, because this piece is gorgeous! Thanks for sharing.
ReplyDeleteThis is an adorable project!
ReplyDeletehttp://momdaughterstyle.blogspot.com/
Great transformation!
ReplyDeleteThanks for letting us all know what to avoid when we try our own awesome stenciling projects ;) I think I've done each of those things myself! Amazing transformation!!
ReplyDeleteYou are so good at this. I can sure learn a lot from you and your projects. :) So glad you linked this one to Motivated Monday at BeColorful
ReplyDeletePam
What a neat vanity with the piece that flips up! The stencil work is really pretty!
ReplyDeleteI am delighted that you linked to Potpourri Friday. I appreciate you and hope to see you again this Friday!
Beautiful redo. Love the color and I love the stencil touch. Thanks for sharing with my newbie party. Please add my link as well. thanks.
ReplyDeleteWhat a great transformation! This is just beautiful! I am now following you via the creative blogger's party. I hope you will follow me too! Blessings to you!
ReplyDeleteThis looks so pretty! Very nice makeover! Thank you for linking it to Home Sweet Home!
ReplyDeleteSherry
This turned out so great! Good choice with removing the top drawers! I love it! Thanks for sharing it on {Re}create Into Something New last week!
ReplyDeleteHope to see again tomorrow for another blog party at my place!
Kaitlin-The Not So Simple Housewife
http://notsosimplehousewife.blogspot.com
great job! thanks for a great post, and keeping it real!
ReplyDeletegail
what a gorgeous piece of furniture, wish I could find one of those!
ReplyDeleteShe looks beautiful with her new colors. Cracks me up how sometimes she looks gray, and sometimes she looks blue!
ReplyDeleteWow that was a lot of work to get it to that point. It looks amazing! ~Pepper
ReplyDeleteOh how I love your site! I have seen these in Charity shops, always want to buy one to give it a make over. I just have no room :(
ReplyDeleteThis is just gorgeous x
Neon Trees Picture Show download mp3
ReplyDelete