It might sound crazy, but right now my dream house is the kind of house that most people wouldn't exactly find, well, clean and inviting. I want to buy the cat lady's house. Do I want to live in cat lady's house as is? Ew, no! Of course I would fix it up. There are lots of reasons for this desire. The first is that the house would probably be for sale at 70% of market value (including renovations) and ultimately it would be a good return on investment when beautified and sold. The second is that I want to add my own touch to every room by doing it myself. There are more reasons but I'll move on now.
Since at the moment I don't have my own fixer-upper, I begged suggested to my mom that I make the 7 hour drive with my 2 year old to redo her basement and she jumped all over it.
Here are the before and after pictures. Below them I show the process but if you're the type that thinks I've already written too much, you can stop here and I love you anyway.
Before

After

Okay, for those of you who are still reading, here are some more before pictures. Notice the deer head, antlers, and duck. As Ace Ventura would say, this is the "Room of Death" and my dad and brother loved it just as it was. Fortunately for me, my mom was ready for a change.


Day 1: clean up
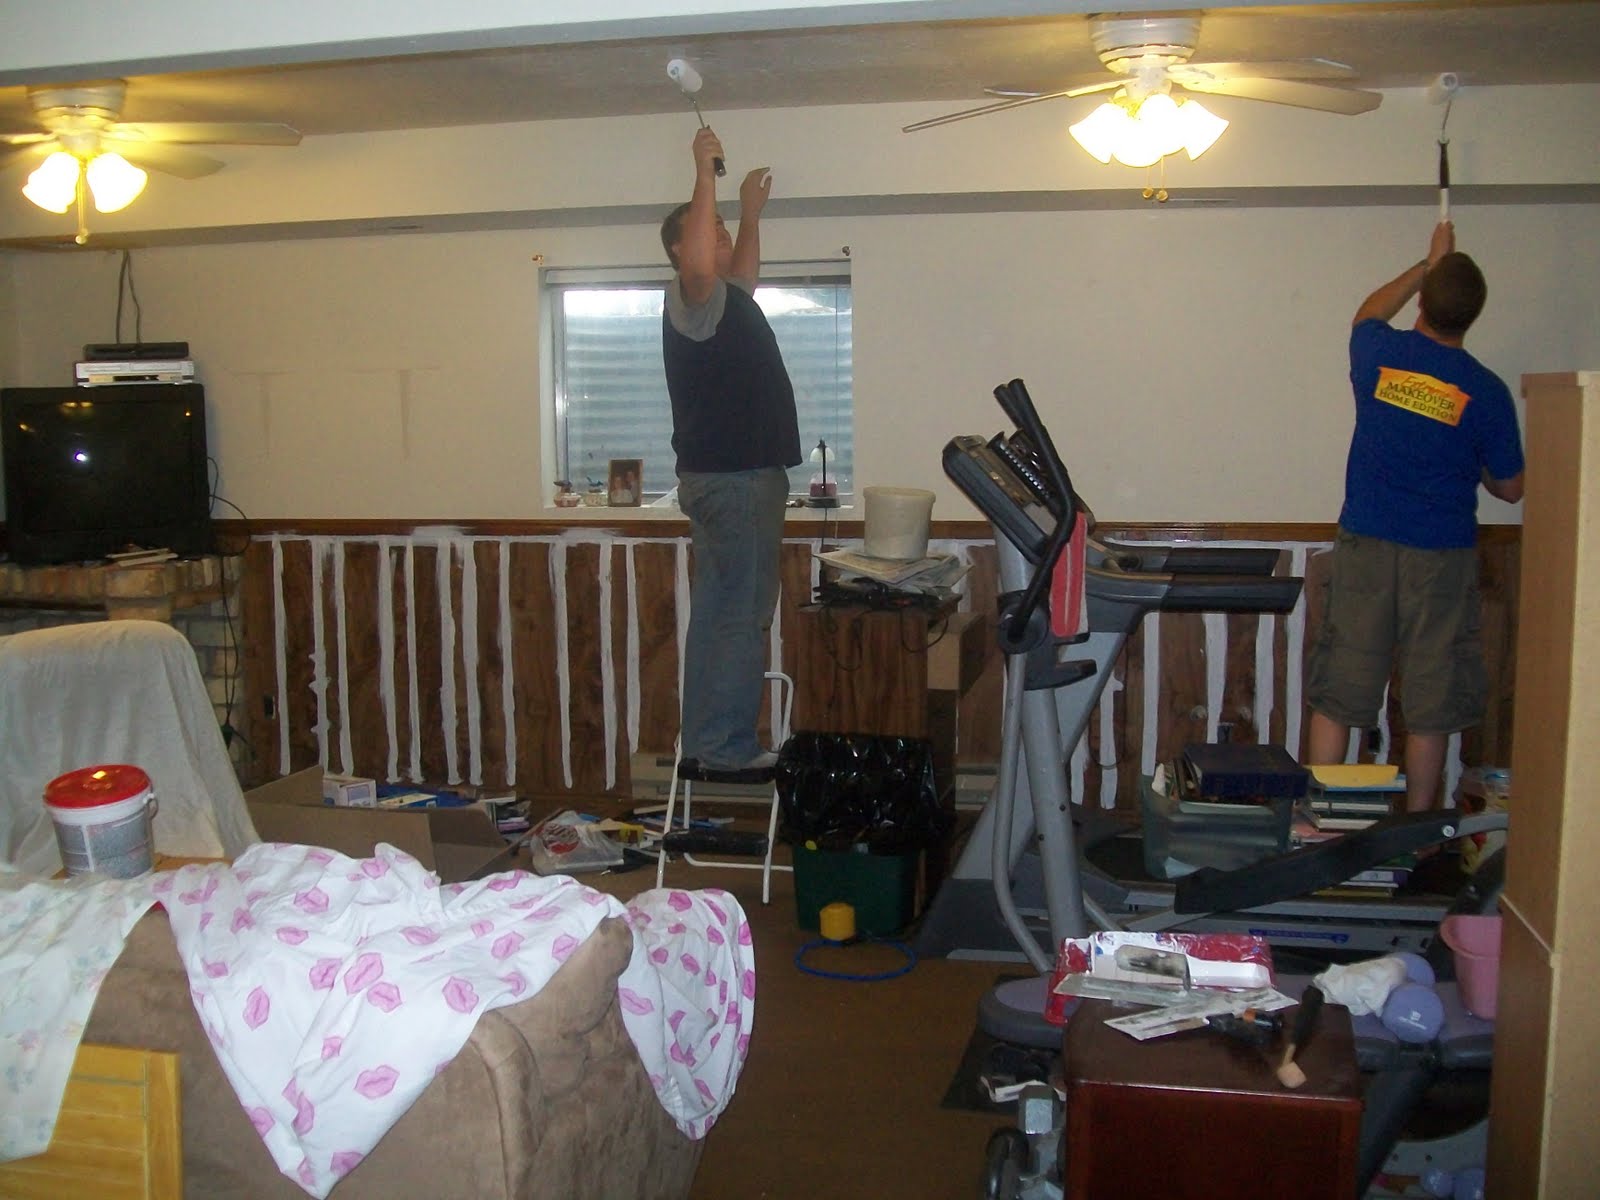
We started by throwing away/donating the cassette tapes, most VHS tapes, and lots of unused books. We took down the animals (my dad almost cried. He honestly came in the garage -- their new location -- after work and saw them and said, "poor animals," like they were more saddened to be taken off the walls than to be shot... by him.) Brother #2 came to help that day too and both bro's painted the ceiling ultra pure white in Behr while I painted the dark wood paneling the same color.

Day 2: carpet removal
This was the most disgusting (and slightly frightening day). The 20+ year old carpet had to go so my mom and I pulled it up and took it out in sections, mold and all -- I really thought I was going to get Hantavirous or some kind of other inhalation disease. Thank goodness I'm still disease free!
After the carpet was gone I patched the holes in the cement so we could have a smooth surface to paint (yes, paint!).

Day 3: fireplace
Don't let the simplicity of "painting the fireplace" fool you. This task took hours. We had to prime first, then paint. I worked on it until 3:30am and got up at 8:30 to work some more.


Day 4: paint walls and finish floor/decorate
This was my favorite day even though at the end of it I ended up bawling my bloody eyes out because of frustration (brother complaining because we ruined his "man cave" --what?!, toddler wanting only mommy all day, etc.) mixed with lack of sleep. We painted the walls blue (don't remember the exact color) and the floors we primed and painted Wicker.


We recycled or made all the decor. These were things that my mom had or we bought 2nd hand. The vase above the fire place was $.75 and the rest were things my mom had.

I bought this table at a garage sale for $5 and painted it.


I made this sunburst mirror out of shims, cardboard and hot glue. I found the tutorial on Hi Sugarplum but then decide to make my own tutorial because I changed a few things. Go
here if you want to see how it's done.

My mom cut some golden weeds from the side of the road (I have to give her credit because she is great at finding that kind of thing). We found the candlestick holder on the ground for $2 at a garage sale in Delta (which was actually one of the best garage sales ever! -- go Rabbits!... that's the high school mascott, if you didn't know).
One thing that will make my dad and brother happy is the new flat screen TV that Santa will probably bring this Christmas and mount on the wall -- not that "TV 1990" is bad. I'm just sayin'.

The curtains are on loan from little sister's room. They will be replaced with non sheer white curtains to make the window appear bigger. There will also be a big rug in front of the couch and a beige love seat perpendicular to it.

So, my mom has some homework to finish but we are 98% there. She had to go to girls camp this week and I took baby girl home to see her daddy, otherwise it would be done today.
To sum things up, I think the total cost of the project was $200-ish for paint/primer, $15 for sunburst mirror, $5 for end table, $2 for candlestick holder, $.75 for vase, and free for everything else because we already had it. Not bad for $222.75, right?
What do you think? Please comment and follow this blog. I will be posting all my DIY projects on this blog instead of my family blog and I would like to make it big enough to get sponsors (hopefully paint brands) so I need people to follow it. Just look at the top of the right column where it says "followers" click "join this site" and enter the things it prompts you to enter. Thanks for reading!
Linky partying at all the fun parties on my
Linky list. Check them out for more totally inspirational finds.


 Step 3: Draw another circle so there is about 1.5 inches between the edge and the small circle. I used a bowl that was smaller than the plate.
  Step 4: Glue the shims in a circle around the smaller circle. It is hard to see in the picture because I used the extra cardboard as a turn table and to protect the floor from hot glue.
 Step 5: Glue shims in between the other shims. I lowered mine about 1 inch for depth.
 Step 6: I glued another shim between each shim, making sure to stagger them at different lengths.
 Step 7: When the hot glue was dry, I flipped the project over and glued 4 extra shims around the cardboard for stability. Then I took a piece of scrap material and glued it so the mirror could hang.
 Step 8: Glue the mirror to the front center of the sunburst.
  I put mine in our sitting area. This picture is to show the size (don't look at the wall color! I'm so beyond ready for a change).
 Now I'm off to go garage sale-ing. Have a great Friday!
 After: